


![[ACCESS POINTS]](https://b2b.cy-wireless.com/image/cache/catalog/category/1454-70x70.jpg)
![[SWITCHES]](https://b2b.cy-wireless.com/image/cache/placeholder-70x70.png)
Configure CyberPower UPS with Vmware ESXi

Configure Cyberpower UPS with VMWare ESXi 6.0 and above (Licensed Version)
Configuration Setup
Server : Dell R710
UPS Model : RP750ELCD
Card Used : RMCARD205
VMware : ESXI Essentials Version 6.5
A: UPS Preparation
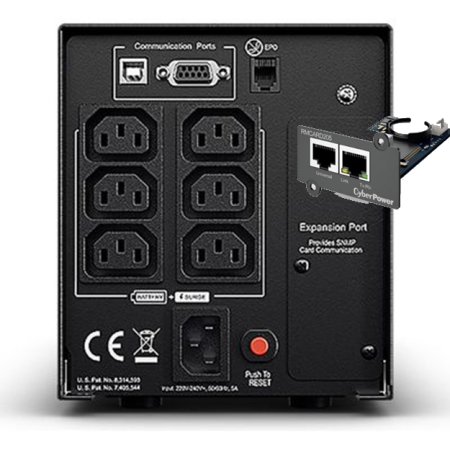
- Install CyberPower SNMP UPS & ATS PDU Remote Management Card in the UPS
B: SETUP RMCARD205
1: Detect Card Using PDNU Software Download Link
https://www.cyberpower.com/eu/en/product/sku/power_device_network_utility_2_for_windows#downloads
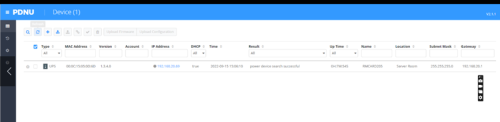
2: Login to Web Interface of the Card (default username: cyber password: cyber) using the IP assigned by DHCP and shown on the PDNU Software above

3: Change IPV4 Address to Static

4: Change Default Username and Password

5: Configure NTP and Date/Time format

6: Set any other setting you find useful for your setup.
C: Installation of CyberPower PowerPanel Business Remote Virtual Appliance
1: Download Virtual Appliance from web address and unzip the compressed file
https://www.cyberpower.com/eu/en/product/sku/powerpanel_business_for_virtual_machine#downloads
2: Install VA on ESXI Server Using the OVF File from the extracted directory

3: Test connectivity with RMCARD205
a. On RMCARD205 web interface check that the Virtual Appliance IP is shown as described on the screen below

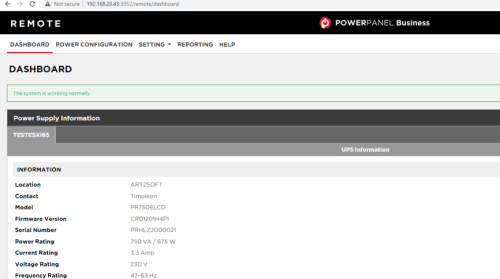
4: Login to PowerPanel Business Remote to start the configuration using IP address assigned by VMWARE xxx.xxx.xxx.xxx:3052

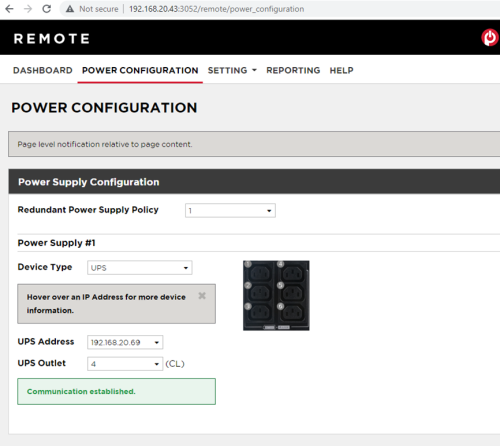
5: Select UPS and Outlet the ESXI server is connected as shown below
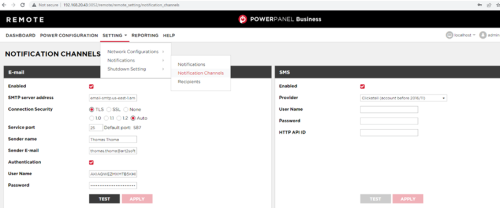
6: Configure and Test Notification Channels as shown below
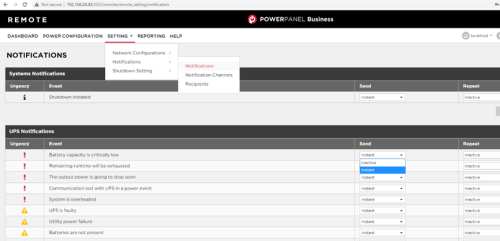
7: Configure Notification Settings as shown below
8: Configure ESXI and Virtual Machine Shutdown Options as shown below*
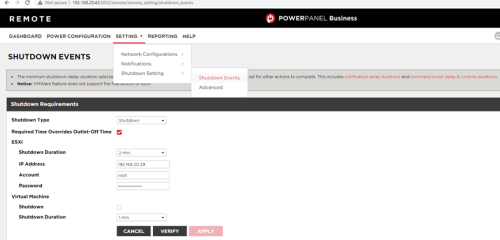
*Preferably set autostart option of ESXI Server and set the priority of Start/Shutdown of the VM machines rather than shutting down the machines from the UPS software. Please see below


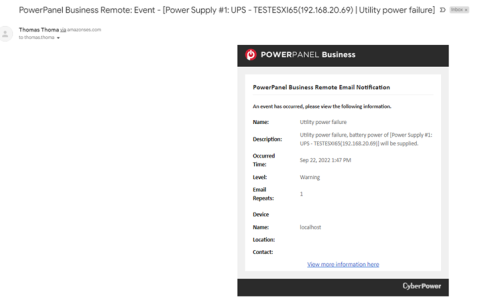
9: Test notification functionality by switching off and then on the main power from the ups verify that notifications are working ok
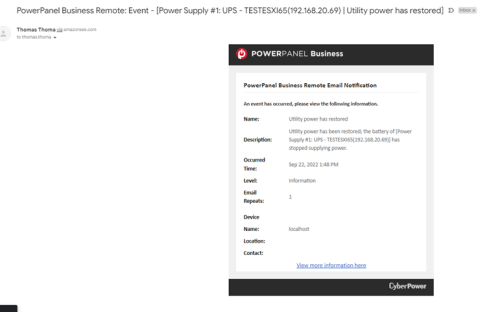
a: Power Failure Notification
b: Power Restore Notification